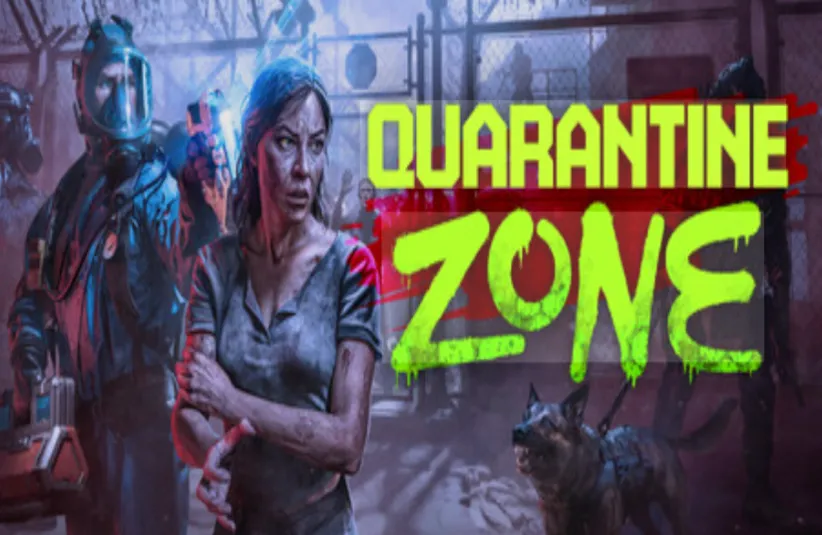
Essential Guide to Mastering Quarantine Zone: The Last Check
If you thought your day job was stressful, try being the only thing standing between humanity and a total zombie apocalypse. Quarantine Zone: The Last Check dropped on January 12, 2026, and it essentially asks the question: What if “Papers, Please” had a baby with Contraband Police and raised it in a biohazard lab? Your role is simple yet terrifying. You are the gatekeeper. You decide who enters the sanctuary and who gets sent to the liquidation zone. One mistake doesn’t just mean a bad performance review, it means an outbreak that wipes out your entire camp.
To survive the shift and keep your base standing, you need to understand the Quarantine Zone mechanics inside and out. This guide breaks down the essential “tools” you will use to diagnose survivors, upgrade your defenses, and manage the chaos without losing your mind.
Mastering Your Inspection Arsenal
The heart of the gameplay loop involves inspecting survivors. Early on, everyone looks relatively normal. But as the days progress, the virus gets trickier, and the survivors get sneakier. You cannot rely on a visual check alone. You have to utilize your specialized inspection “tools” to find the truth hiding beneath the surface.
The Flashlight
This is your bread and butter. Before you bust out the heavy machinery, use the Flashlight for a basic visual sweep. You need to be thorough here. Walk around the survivor, crouch to check their legs, and inspect their neck. If they are wearing sunglasses or a hat, make them take it off. You can’t diagnose what you can’t see.
Thermopulsometer
This device is vital for checking vitals. It measures body temperature and heart rate. You are looking for anomalies here. Elevated readings usually mean you should send them to the Quarantine Zone for observation. If the readings are “High” or “Extreme,” you are likely dealing with an active infection. Later upgrades make this easier with color-coded warnings, so prioritize those if you struggle with the numbers.
UV Scanner
Some infections don’t show up under normal light. That is where the UV Scanner comes in. This “tool” is essential for spotting glowing traces of infection on skin or clothing that the naked eye misses. It is also great for scanning luggage.
Reflex Hammer and Stethoscope
Once you unlock the Reflex Hammer on Day 3, you can test nervous system responses. You want a normal, backward swing. Anything else suggests the virus is messing with their motor functions. Similarly, the Stethoscope lets you listen to their lungs. Wheezing is bad, but a growling sound? That is a one-way ticket to liquidation.
Portable X-Ray and Matioscope
These are your heavy hitters for deep inspection. The X-Ray reveals internal organ damage or contraband swallowed by smugglers. The Matioscope allows for microscopic eye exams to catch parasites. These “tools” take time to use, but they save lives.
Deciphering Symptoms and Infections
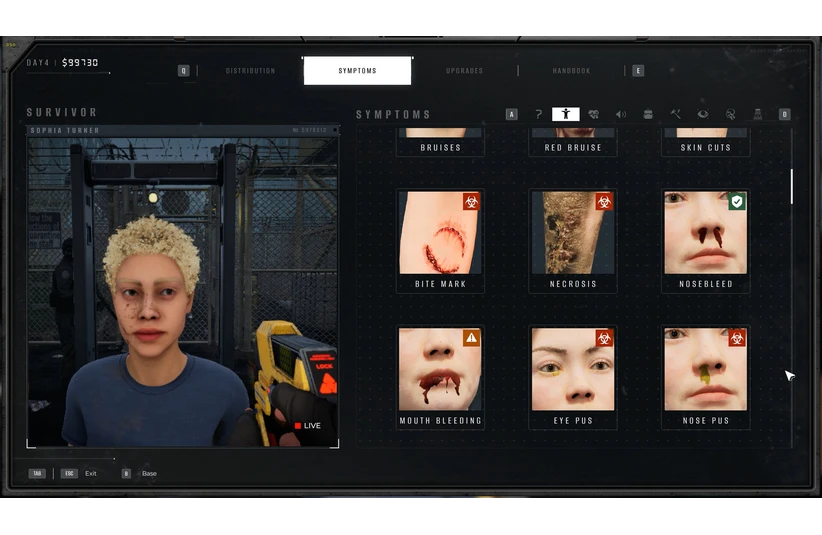
Devolver Digital
The game uses a color-coded box system to help you make decisions, but you still need to know what you are looking at. A Green box means the symptom is harmless. An Orange box means you need to quarantine them. A Red box means they are a threat.
It can be confusing because some “scary” looking symptoms are actually benign. For example, survivors with “Yellow Eyes,” “Red Skin,” or “Herpes” are actually safe to let through. It might look gross, but it isn’t the zombie virus. However, “Red Eyes” or “Green Skin” are immediate red flags for liquidation.
You also need to distinguish between injuries. A regular “Bruise” is fine. A “Red Bruise” requires quarantine. But “Necrosis,” which looks black with red patches, means they are already gone. Do not hesitate to liquidate.
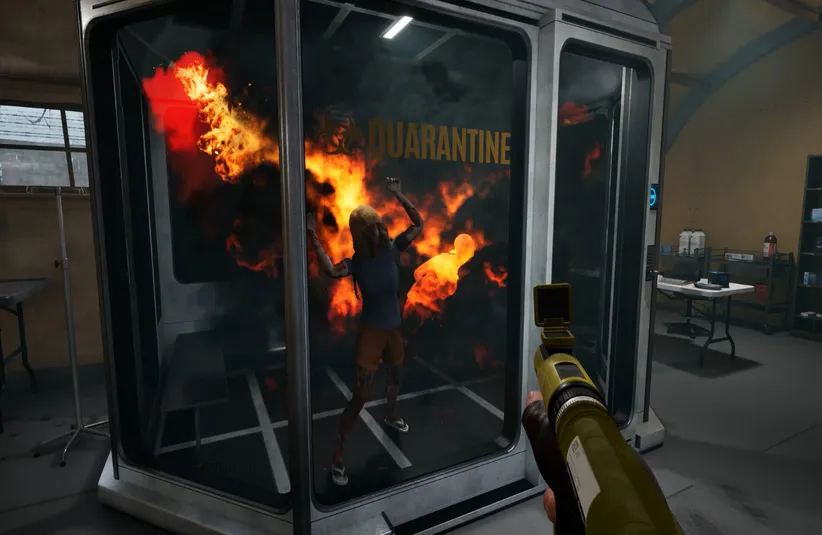
Managing the Quarantine Zone
When you encounter a survivor with an “Orange” symptom like a cough, pale skin, or elevated temperature, you send them to the “Quarantine Zone.” This isn’t a prison, it’s a waiting room.
You must recheck these people within 24 hours. This is crucial. If their symptoms clear up, release them. If they get worse, liquidate them. If you leave someone in there for more than two days, you are playing with fire. An infected person will turn into a zombie and slaughter everyone else in the cell. That is a massive hit to your morale and your “Respect Points.”
Base Defense and Resource Management
While you are playing doctor, the world outside is trying to eat you. Hordes will attack your base, and you need to be ready.
You have a drone equipped with weapons like a Minigun, a 37mm Cannon, and a 105mm Cannon. When the alarm sounds, switch to the drone view. Use the Minigun for close-range shredding and the Cannons for crowd control. Upgrading these weapons is non-negotiable. The zombies get stronger, and your starter peashooter won’t cut it after a few days.
Finally, keep an eye on your logistics. Your survivors need food, fuel, and meds. If your stocks drop below 30 percent, people start to panic and riot. Open your tablet and order supplies before you hit that critical threshold. It costs money, but a riot costs you the game.
Surviving Quarantine Zone: The Last Check is a balancing act. Trust your “tools,” trust your gut, and when in doubt, remember that the safety of the many outweighs the safety of the one.