Best Ways on How to Record Sounds in Phasmophobia, Explained 2025
If you’re neck-deep in the spectral chaos of Phasmophobia and not using the Sound Recorder… well, what are you doing with your life? This quirky little gadget might look like an ancient Walkman, but it’s essential if you’re serious about documenting paranormal shenanigans and living to tell the tale (or respawn). Here’s everything you need to know about recording sounds in Phasmophobia without looking like a total rookie.
Become A Real Ghost Hunter: Learn How to Record Sounds in Phasmophobia, Explained [Watch]

Why the Sound Recorder is Your New Ghost-Hunting Bestie
First off, let’s clear something up. The Sound Recorder isn’t some hipster accessory for retro music lovers. No, it’s a sophisticated (okay, semi-scary) device designed to help you capture paranormal noise evidence. Think ghost whispers, creepy shrieks, and evidence sounds like Spirit Box responses or even EMF Level 5 hums.
But that’s not all, folks. Beyond amassing audio proof to fill your journal, properly wielding the Sound Recorder can help you locate the ghost’s whereabouts. Think of it as the game’s eerie compass, leading you closer (for better or worse) to the spooky origin of those hair-raising noises. That said, misuse it, and you’ll probably just embarrass yourself while your teammates collectively sigh in frustration.
How to Record Sounds Like a Ghost-Hunting Pro
1. Equip Your Recorder Like a Champ
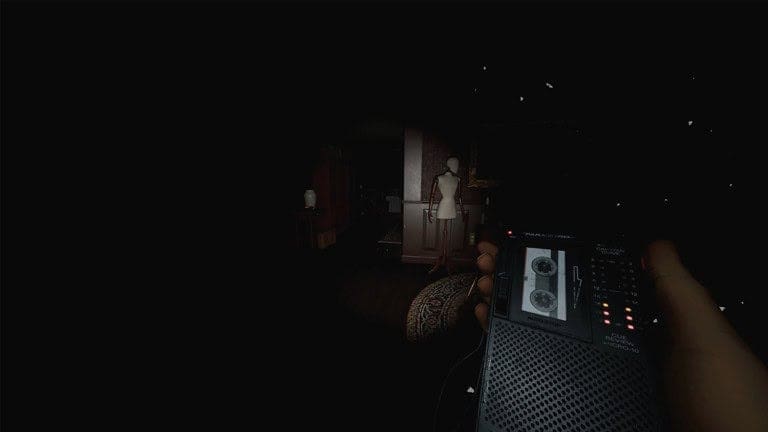
First things first, grab the Sound Recorder from HQ. Aim for the Tier III version if you can snag it, because it comes with fancy directional audio and visual cues. Analog horror aesthetics, anyone? Once equipped, activate the device to get it scanning for background spooks.
2. Locate Those Suspicious Noises
The Recorder’s sound meter is your lifeline. If you see the lights inching toward green (Tier I) or spot the graph spiking on Tier II and III models, congrats! You’re in spooky business. This means you’re close to the sound source. By the time the radar’s center turns solid (on Tier III), you’ve hit paranormal paydirt.
3. Start Recording Without Screwing Up
This step trips up plenty of newcomers, but we’ve got you. Once you detect a noise, hold the Use button to record. Don’t just mash it desperately; you’ll need to hang around until the recording captures the full spooky audio. Successfully recorded audio automatically uploads to your in-game journal. If it doesn’t, well, sorry pal, you either botched it or weren’t close enough to the shenanigans.
Bonus tip? You’ve got storage space for up to three audio clips per contract. Don’t waste it on non-evidence sounds. Save that recorder space for the juicy stuff like ghost whispers or Banshee screams.
Pro-Level Ghost-Recorder Mechanics You Need to Know
Here’s where things get wild. Different ghost types tinker with the Sound Recorder’s mechanics, keeping you on your toes:
- The Banshee occasionally blesses (curses?) you with its signature shrieks just to keep things interesting.
- The Moroi has some real salt-in-the-wound energy. If you successfully record their sound, they can slap you with a curse in exchange. Lovely.
- The Myling? It’s chatty. These ghosts frequently sprinkle paranormal noise breadcrumbs on the Sound Recorder, practically begging to say, “Hi.”
Tips for Not Looking Totally Clueless
Smart usage of the Sound Recorder can drastically increase your group’s survival odds and make you the MVP in those “What went wrong?” post-mortem team chats. Here’s what you need to know:
- Stick to Smaller Maps: The Recorder’s short range makes sprawling areas a pain to cover effectively. Save it for compact, haunted spots where you can move quickly between rooms.
- Cross-Reference Other Gear: Use the EMF Reader alongside your Sound Recorder to double-check activity hotspots. Two spooky birds, one terrifying stone.
- Know When to Ditch It: Look, not all battles are worth fighting. If you’ve got evidence and things are heating up, don’t be a hero with the Recorder. Drop it and bail.
What’s the Deal with the Tiers?
The Sound Recorder comes in three levels, or “tiers,” each ramping up its usefulness:
- Tier I: Basic as heck. It detects sounds but doesn’t offer much in terms of precision.
- Tier II: Getting better. You’ll have a graph to help track sound levels.
- Tier III: The Rolls-Royce of Recorders. It gives you directional indicators and precise tracking, which can be a game-changer in intense hunts.
Pro tip? Invest in Tier III when possible. It’s the path to less stress and fewer ghostly jump-scares (kind of).
Recording Evidence vs. Becoming Evidence
Sure, capturing ghostly sounds is fun, but remember this golden rule before you go full ghost-hunting influencer mode recording everything in sight. Don’t die mid-recording. No one’s impressed by a Sound Recorder you dropped in terror during a hunt. Always prioritize survival. Because as cool as these recordings are, they don’t mean much if your team’s short one member for the rest of the hunt.
Closing Thoughts
The Sound Recorder in Phasmophobia isn’t just a cool gadget; it’s a lifeline, a detective partner, and an (ethical?) ghost paparazzi rolled into one. But like all tools in this haunted sandbox, it’s only as smart as the person using it. Learn its mechanics, respect its limits, and for the love of all things spooky, avoid getting cursed by a Moroi.
If you’re serious about ghost hunting (and not just screaming aimlessly in fear), mastering the Sound Recorder is non-negotiable. Keep your wits about you and a steady hand on that Use button. Happy ghost hunting, and remember to turn off the Recorder before you become a ghost yourself.
Visit Total Apex Gaming for more game-related news.


![THQ Nordic Reveals New Trailers for ‘REANIMAL’, ‘Darksiders 4’ [Watch]](https://totalapexgaming.com/wp-content/uploads/2025/08/reanimalce.webp)